Smart Girls DIY has moved to SmartGirlsDIY.com and this post can now be found here
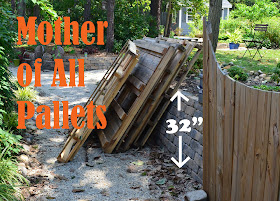
This project isn't entirely finished {much like every other project in my house}, but I couldn't wait to share it with you. Plus, you might think I was slacking all weekend, and that definitely wasn't the case. It all started a few weeks back when I sent hubby to pick up some pallets. I make it a regular habit to check the free section of craigslist, and low and behold there was a listing for free giant pallets and they were right near our house. I sent hubby in search of a motorcycle shop, which gets deliveries on giant-sized pallets. He must have been only half listening because he sent me a text when he got there, something to the effect of, "These are the biggest freaking pallets I've ever seen!" But he managed to get 4 of them home anyway. And they sat like this in our yard for weeks.
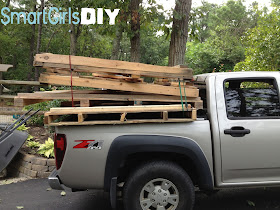
Here they are on his truck...
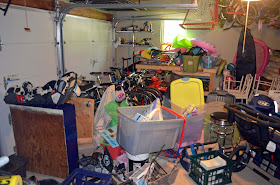
And then it hit me! Our garage is a disaster. You'd never know
that I've built multiple storage shelves, a work bench, etc. It
looks like crap!
And then it hit me! Our garage is a disaster. You'd never know
that I've built multiple storage shelves, a work bench, etc. It
looks like crap!
I told ya! Wait, it looks even worse from this angle...
But do you see all the wasted space above the bikes but below the garage doors? What to do with this space? You can't attach something to the ceiling because the garage doors are in the way. So what's a girl to do? Build a free-standing dividing wall and then add a giant shelf over the bikes to create easy-to-grab storage. I loved this idea. But wood is expensive, and I'm already up to my eyeballs in projects, and hubby's not going to like me buying all the supplies. And then it hit me people... I'll use the mother of all pallets! {Yes, it seems obvious to you, but I did not have a blog title to go by!}
So while hubby was at work, I lugged this giant sized pallet over...
Cleared some room in the garage...
And pushed that sucker into place.
Before you ask, let me tell you, I didn't do a single thing to that pallet. That's how she came! Unfortunately, the other 3 are smaller, so I am going to have to send hubby back to search for another one this size. I'd like to put one more next to this one.
And now for the shelf. I brought one of the smaller pallets over, measured her, and cut her to size. She was too wide. Then I took off the extra wood that was screwed on top.
Then I waited for hubby because there was no way I was lifting this thing into place and connecting it at the same time. Definitely a 2 person job! And boy was hubby stoked. He didn't quit get it until we lifted the smaller pallet and put it in place against the larger one. But then he loved it!
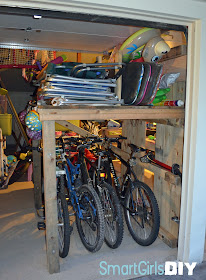
He let me add these handy dividers. And helped take apart one of the other pallets for scrap wood. We used two of the thin pieces to fill in the gap you see above. Then we used 2x4s as the support pieces for the left side. In the end, we didn't buy or use a single piece of new wood. Yay!
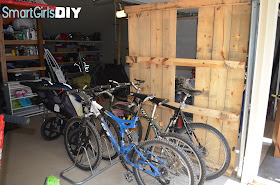
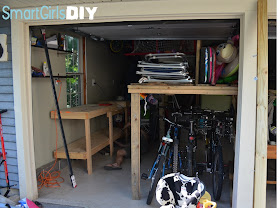
This is the first pic of the giant pallet organizer in place. You can see hubby on the floor unscrewing my workbench from the wall. Good work hubby!
And here is the workbench moved to its rightful spot on the workshop side of the new pallet wall. I can not express to you my joy. Even though I have a lot of cleaning/organizing left to go.
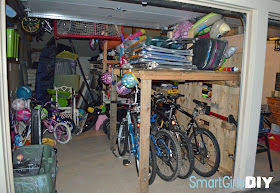
A few more "in progress" pics...
I'll finish up tomorrow {in my dreams} and take some more pictures for you. Goodnight! I'm off to watch Gilmore Girls with Smart Jr. I am so happy to share one of my favorite series of all time with her. She L.O.V.E.S. it! I own every season on DVD. We are watching it episode by episode. :)
Smart
Girl






Looking good! That is a great idea to designate a workspace area. I am eying that workbench of yours. I do not have one. I (we) have been using the garage floor or plywood over saw horses. lol I also like the seating that you use. Ideas...ideas... ;)
ReplyDeleteThanks Julie. I built the workbench a few years ago using these plans from The Family Handyman. http://www.familyhandyman.com/workshop/workbench/modular-workbench/view-all I've never actually sat at those benches to work, but that's the plan. Those are from our old kitchen. :)
DeleteLooks much better! I'm in the middle of cleaning/organizing my shop too. Can't wait to get to the bench building stage. Feels so good to see the floor!! lol
ReplyDeleteHi Anne! Thanks! It's been a long time coming. And of course I haven't finished it yet either. My project ADD kicks in and next thing you know I want to make your mason jar soap dispenser. ;)
Delete